Build a Windmill-Powered Music Box
DIY instructions
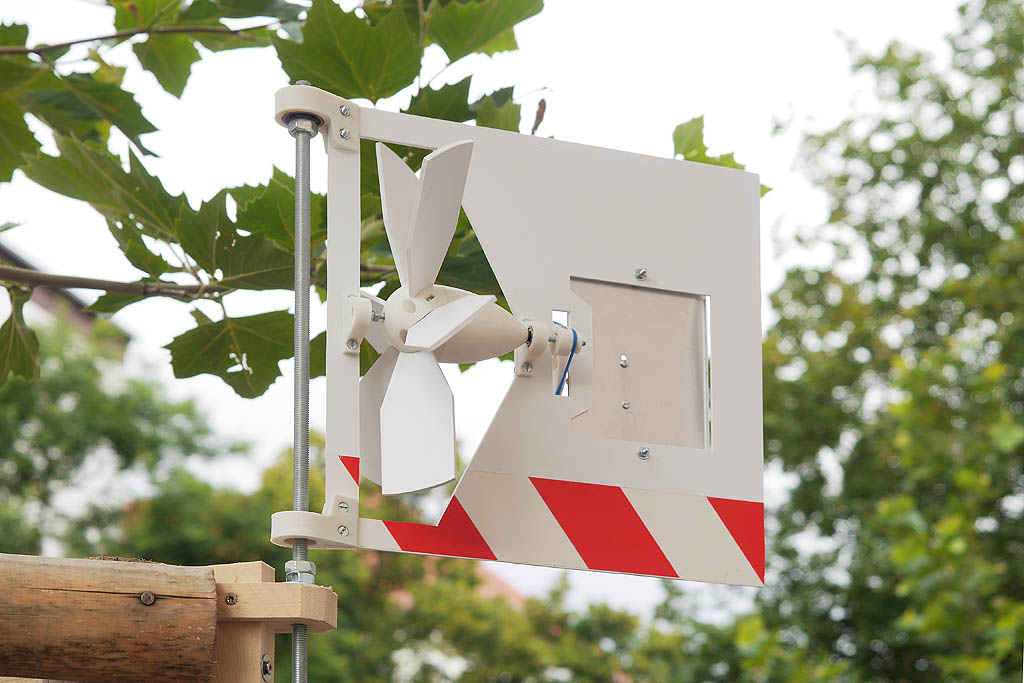
I've built a little windmill that powers a music box. I set it up in front of my workshop, where it was entertaining the entire neighborhood. People really seemed to like it - quite many took photos of it with their smartphones and spent long time watching it and listening to it. Unfortunately one person liked it a bit too much and stole it during one night.
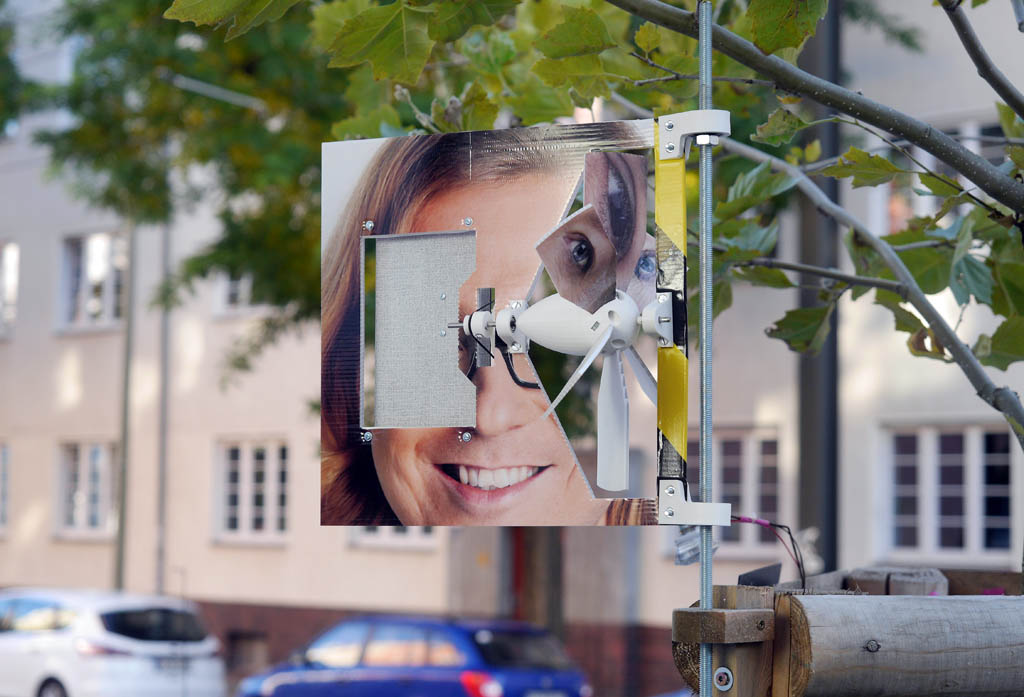
The windmill is built out of a couple of 3D printed parts and some soft plastic sheet material. The construction is relatively easy to replicate, so I decided to make a whole bunch of them, which will be shown as a large public art installation at KIKK Festival 2017.
Since I was already into mass manufacturing windmills during the past weeks, I also thought that it would be nice to have a new one for my street in order to replace the stolen one. When I was building that new windmill, I filmed myself and made a how-to video. If you also want to have such a charming device, you can now either visit my street at night and steal my new windmill (and make me sad) - or you can watch the video and make your own, which would actually make me happy!
How-to video
Materials list
| Amount | Piece | Purpose / Resource |
| 1 Set | 3D printed parts | Download from youmagine or from my server |
| 1 Set | Paper templates | Download them here |
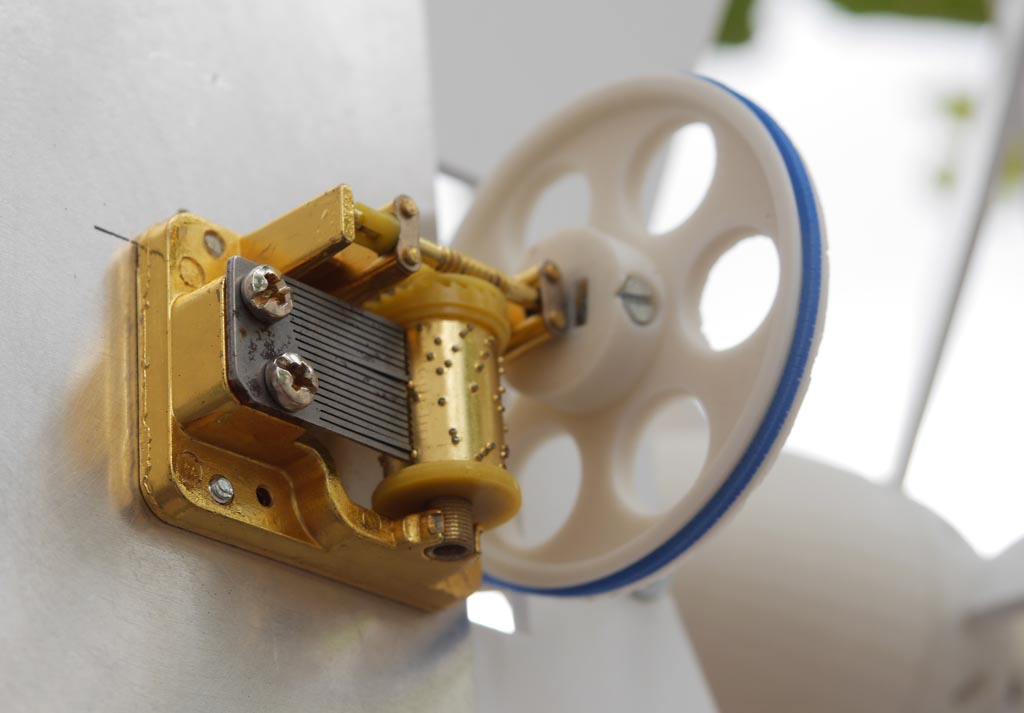
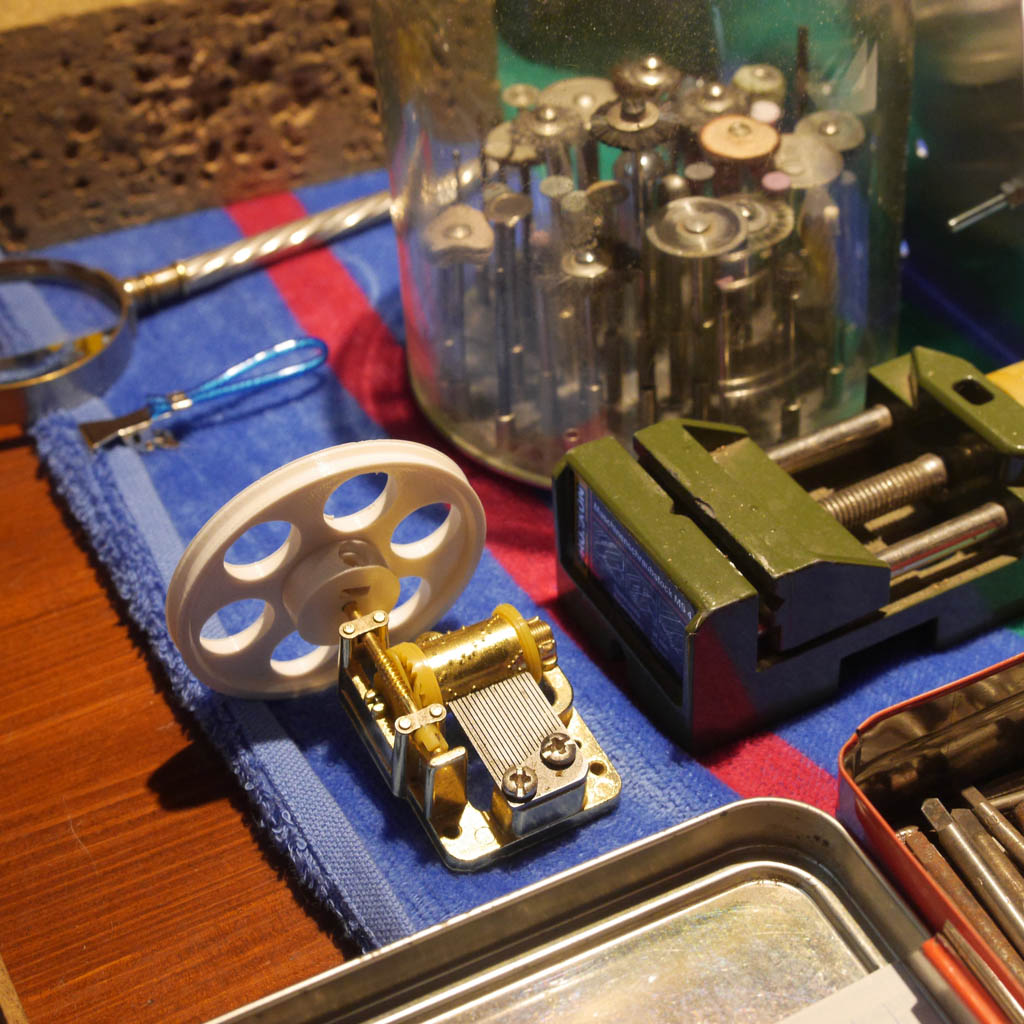
| 1 Piece | Hand crank music box | This will make the music! |
| 1 Sheet | 3mm thick sheet material (e.g. Forex, Alu-Dibond or Coroplast) |
For base plate and windmill blades |
| 1 Piece | Hard sheet material (e.g. a cutting board) |
Used as resonator |
| 1 Piece | Driving belt (worst case a long household rubberband will do the job) |
Connects windmill rotor with music box |
| 1 Piece | 4mm diameter steel rod (18cm long) | Used as axle for the rotor |
| 2 Pieces | Ball bearings 26mm outside diameter, 10mm inside diameter, 8mm thick | Used for the rotor |
| 2 Pieces | Ball bearings 13mm outside diameter, 4mm inside diameter, 5mm thick | Used to mount the base plate |
| 5 Pieces | Short M3 screws (e.g. 10mm) | Used as set screws for the pulleys & to fix the music box on the resonator |
| 2 Pieces | 20mm long M3 screws & nuts | Used as set screws for the rotor parts |
| 4 Pieces | Short M3 screws (e.g. 7mm) | Used to fix the music box on the resonator |
| 4 Pieces | Long M3 screws (e.g. 40mm) | Used to fix the resonator on the base plate |
| 12 Pieces | M3 nuts & washers | Used to fix the resonator on the base plate |
| 14 Pieces | M4 x 20mm screws & nuts | Used to fix the wings on the rotor and the bearing mounts on the base plate |
| 1 Piece | M10 threaded rod (70cm - 1m) | Used to hold the windmill |
| 4 Pieces | M10 nuts | Used to lock the windmill on the threaded rod |
A few more photos
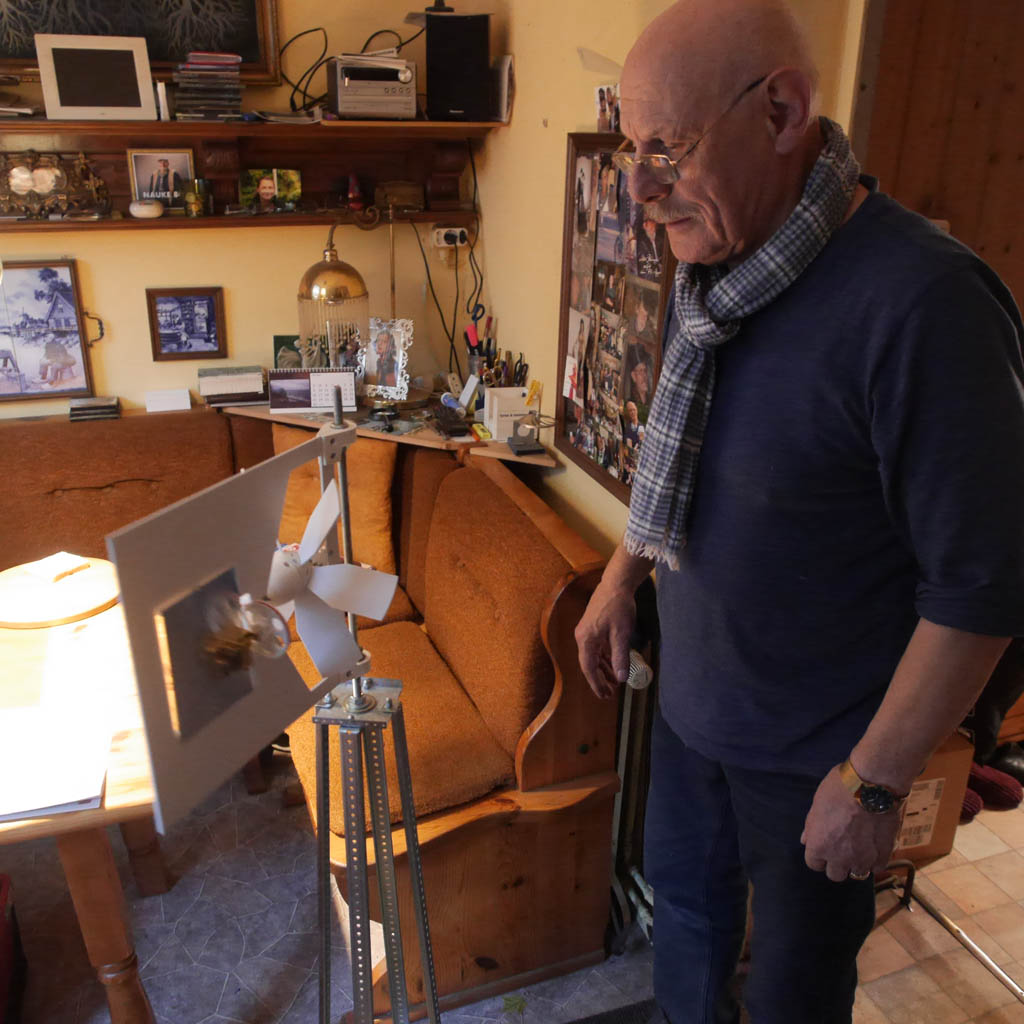
Here's the finished new windmill. As sheet material, I used recycled election posters (which were made out of Coroplast), because I thought that this would look funny. And I find it a pity that all this good sheet material is usually just thrown away after the elections.
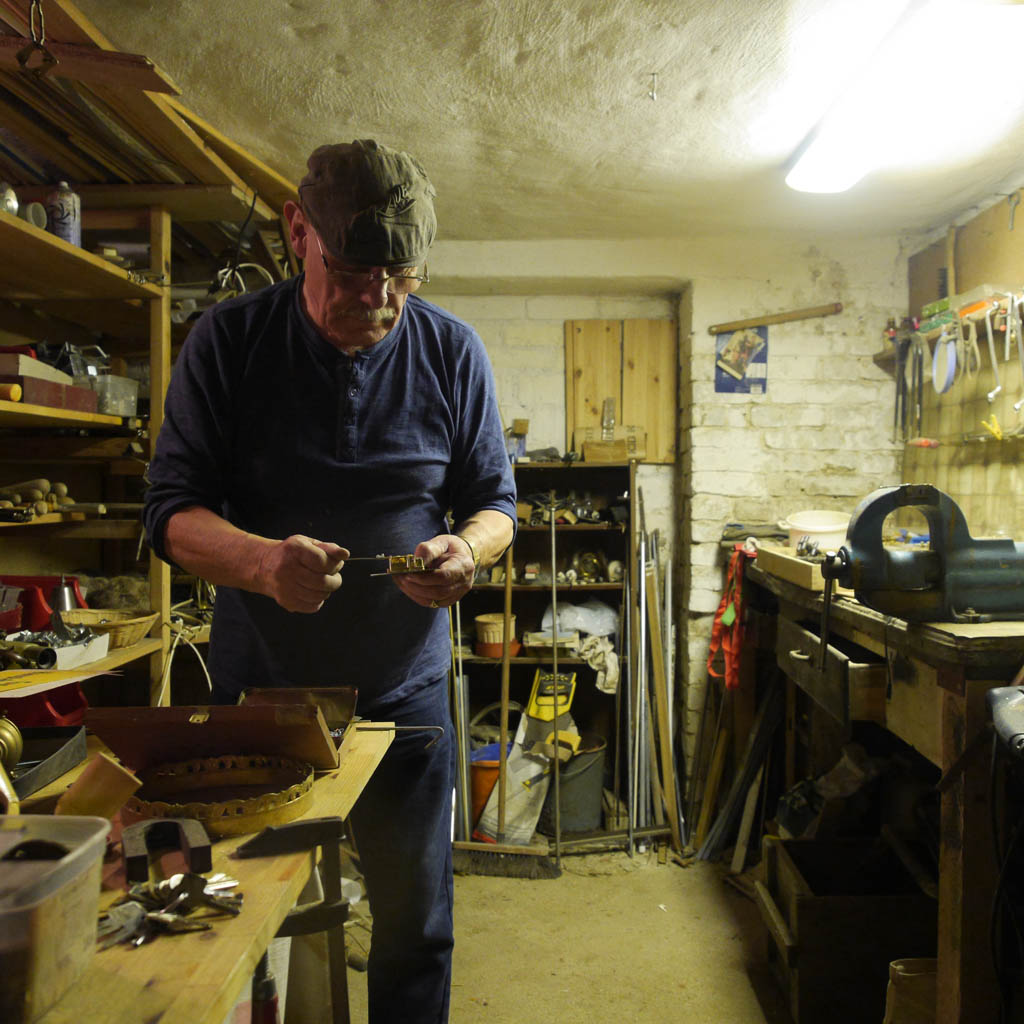
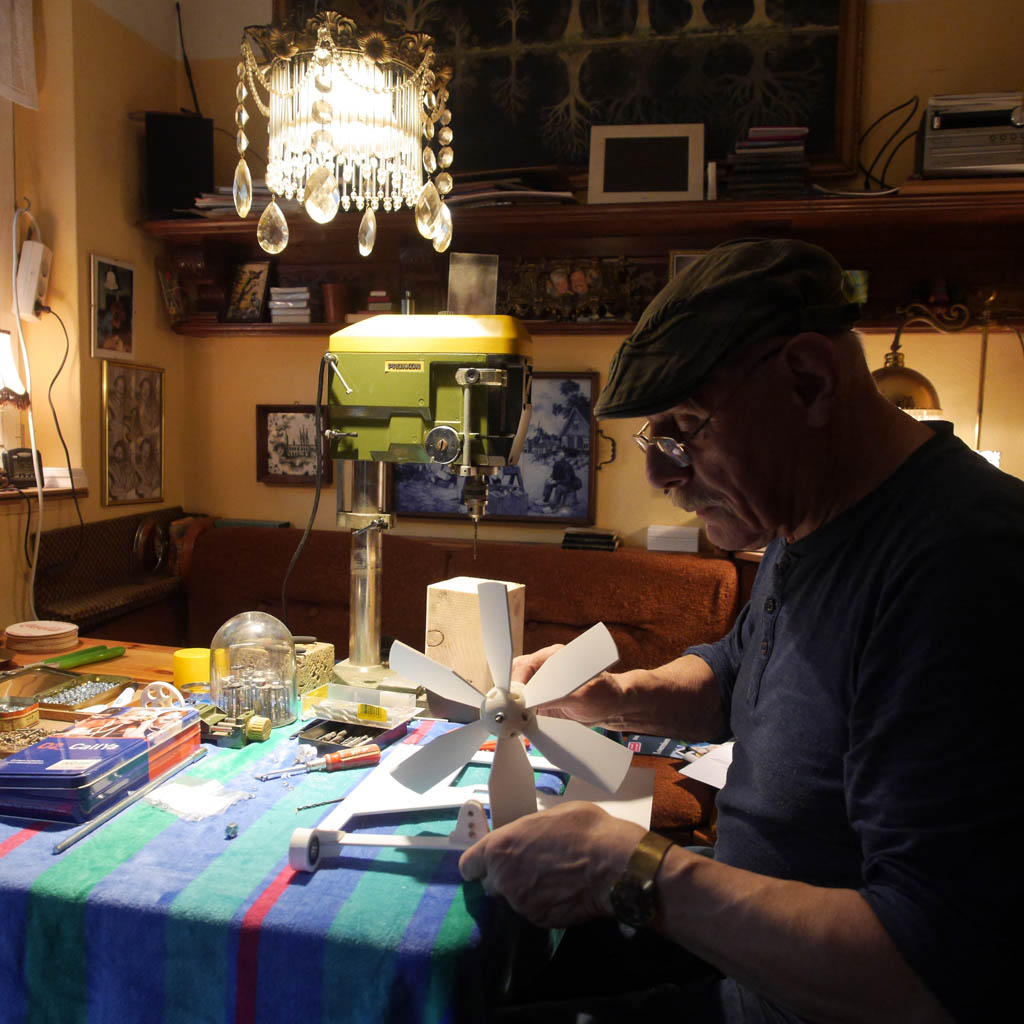
My 80 year old neighbor Nauke also wanted to make a windmill for his terrace. I gave him all the parts and since he's quite handy and into building little things, he had no problems to assemble it in one afternoon.
Special thanks
I want to thank KIKK Festival for funding this project!
Additional resources
- Video on archive.org
- Album with hires photos of the windmills for KIKK Festival - includes the building process [all CC licensed for reuse]
- Album with hires photos of my neighbor Nauke, building his windmill [all CC licensed for reuse]
- Album with hires photos of the old and new windmill in front of my workshop [all CC licensed for reuse]
- 2D files (plans & templates)
- 3D files (Sketchup format & .stl)